Running Interactive Jobs Through a VNC Server
Virtual Network Computing (VNC) is a powerful tool for High-Performance Computing (HPC) environments like Hyperion. It allows users to run interactive jobs on remote servers with a graphical desktop environment. This capability is particularly beneficial when tasks involve graphical applications or require a desktop interface.
When you launch an interactive job through VNC on Hyperion, you are allocated a virtual desktop session on the server. This session is confined to the resources (CPU, memory, etc.) you request in your batch script. It means that all processes run within this VNC session can only utilize the resources that you've specifically allocated for that job.
Initial Setup: Setting a VNC Server Password
Before using the VNC server for the first time, it is essential to set a password for accessing your VNC desktops. This step ensures that your VNC sessions are secure and only accessible by you or those with the password.
-
Running VNC Server Interactively: The first time you run the VNC server, do it interactively (through
sallocorsrunnot through a batch script) to set your password. You can do this by executing/opt/TurboVNC/bin/vncserverin the terminal. -
Setting the Password:
- Upon running
vncserver, you will be prompted to enter a password. This password will be required every time you connect to your VNC session. - You will also be asked if you want to set a view-only password. Typically, you can choose 'n' for no unless you have specific requirements for a view-only session.
You will require a password to access your desktops. Password: Verify: Would you like to enter a view-only password (y/n)? n - Upon running
-
Confirmation of Startup: After setting the password, you will see a confirmation message indicating that the VNC server has started, including details about the display number and log file location:
Desktop 'TurboVNC: hyperion-XXX:1 (username)' started on display hyperion-XXX:1

Starting applications specified in /opt/TurboVNC/bin/xstartup.turbovnc
Log file is /home/username/.vnc/hyperion-XXX:1.log
Warning
Always set a strong, unique password for your VNC sessions. Never share this password with others unless it is necessary for collaboration. Remember, anyone with your VNC password and SSH access to the server can access your VNC session.
Setting Up Your Environment
Before you start using VNC, ensure that you have the necessary setup on your home directory:
-
VNC Startup Script: You must have a VNC startup script named
xstartup.turbovncin your~/.vncdirectory. This script initializes the desktop environment for your VNC session. Here's an example that starts the XFCE Desktop Environment:#!/bin/sh xrdb $HOME/.Xresources startxfce4 &
If this file does not exist, create it with the above contents. The script startxfce4 launches the XFCE Desktop, providing a full desktop experience.
Running Interactive Jobs Through a VNC Server
To start an interactive job on Hyperion using a VNC server, follow these steps:
-
Preparing the Batch Script: Write a SLURM batch script to request the necessary resources. Here's an example script:
#!/bin/bash
#SBATCH --qos=regular
#SBATCH --job-name=VNCJob
#SBATCH --cpus-per-task=1
#SBATCH --ntasks=4
#SBATCH --mem=16gb
#SBATCH --time=01:00:00

vncserver-start
This script requests 4 CPUs, 16 GB of memory, and sets the job duration to 1 hour.
-
Starting the VNC Server: Submit your batch script to SLURM using the
sbatchcommand. Once the job starts, the VNC server will be initiated on the compute node, and connection details will be provided in the job's output file:Starting TurboVNC server... ============================================================== TurboVNC Server Started ============================================================== Hostname: hyperion-215 Display: :1 Port: 5901 ============================================================== SSH Tunneling Instructions ============================================================== To securely connect to the VNC server, set up SSH tunneling: 1. Run the following command on your local machine: ssh -L <local-port>:hyperion-215:5901 <username>@hyperion.sw.ehu.es -N 2. Connect your VNC client to 'localhost:<local-port>'. ============================================================== -
Establish a secure SSH tunnel from your local machine to the VNC server on Hyperion: This tunnel ensures that the VNC session is secure and encrypted. Use the SSH command provided in the output file, replacing
with a port number of your choice. On Linux and macOS you can create the tunnel as follows: $ ssh -L <local-port>:hyperion-215:5901 <username>@hyperion.sw.ehu.es -N -
Connecting to the VNC Session: Use the connection details from the job output to connect to the VNC server using a VNC client on your local machine.
VNC Client for Linux
Using a VNC client on Linux allows you to connect to and interact with the graphical desktop environment provided by the VNC server on Hyperion. There are several VNC clients available for Linux, but one of the most recommended is Remmina due to its ease of use and rich feature set.
Remmina client
Remmina is a versatile and user-friendly remote desktop client for Linux. It supports multiple network protocols, including VNC. Here's how to install and use it:
Installing Remmina
-
Most Linux distributions have Remmina available in their repositories. You can install it using your package manager. For example, on Ubuntu, you can install it via:
sudo apt-get update sudo apt-get install remmina remmina-plugin-vnc -
For other distributions, you may need to use their respective package management tools.
Using Remmina
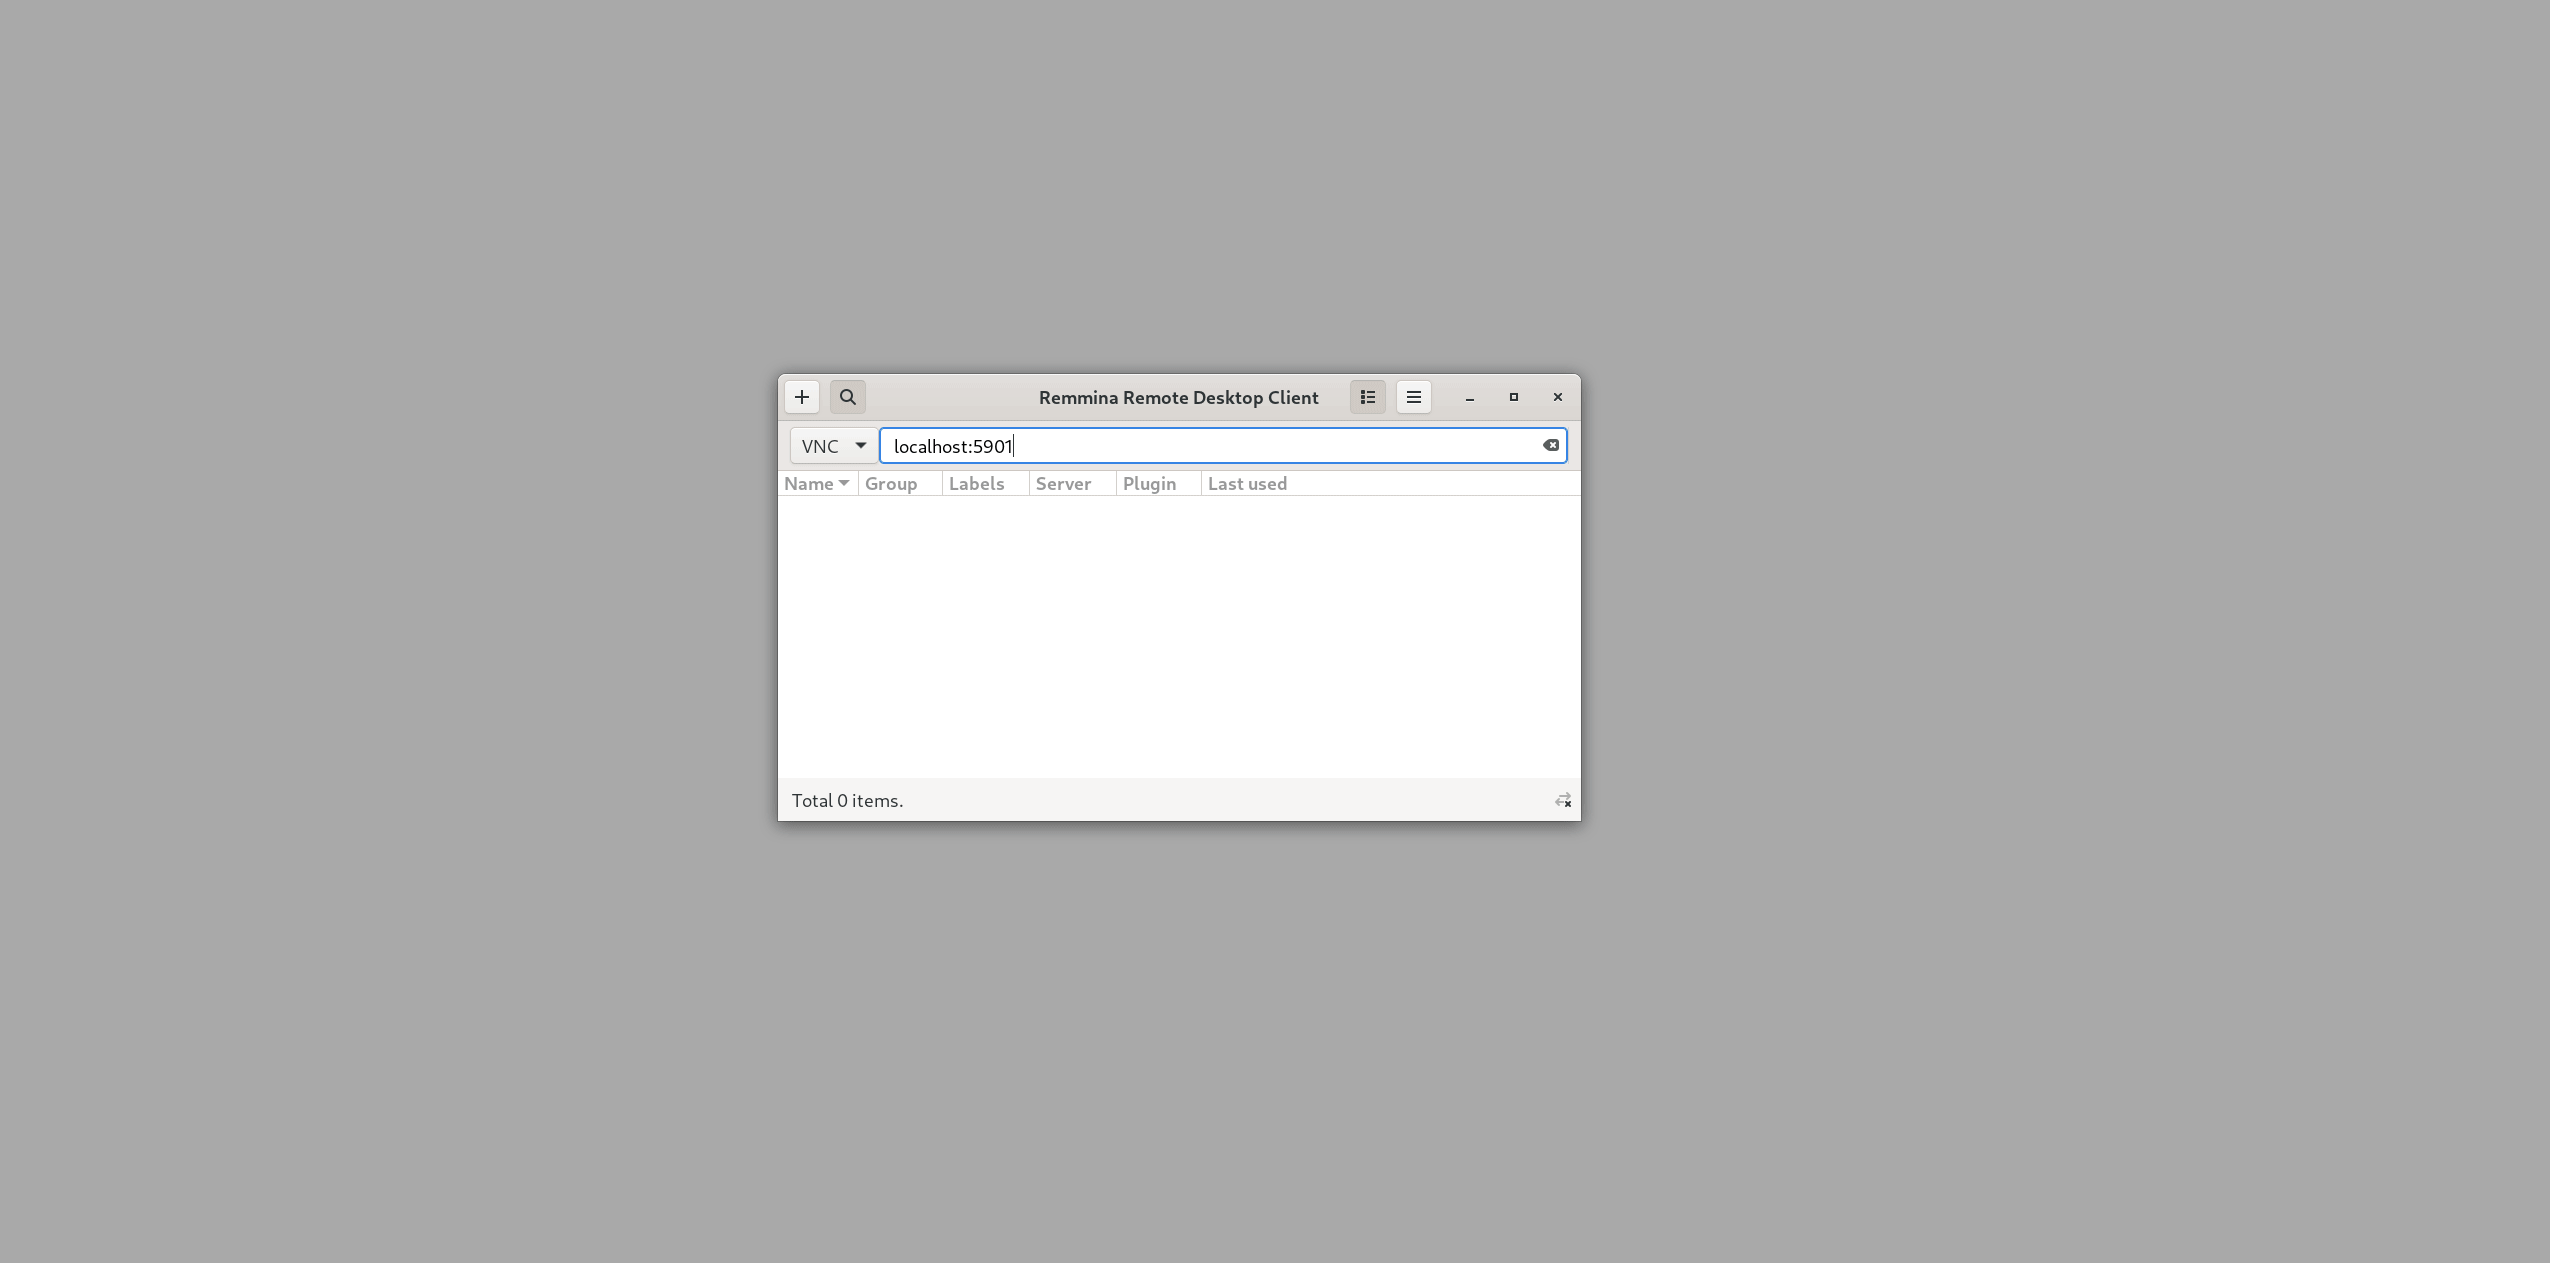
- Open Remmina from your applications menu.
- Click on the "+" sign or "Add" button to create a new connection profile.
- In the protocol dropdown, select "VNC".
- In the "Server" field, enter
localhost:<local-port>(Replace<local-port>with the port number you used in your SSH tunnel command). - You may enter other connection details as required, like the username.
- Click "Connect" to initiate the connection to your VNC session on Hyperion.
Remmina also allows you to save connection profiles for quick access in the future, making it very convenient for regular use.
Other VNC Clients for Linux
In addition to Remmina, there are other VNC clients available for Linux that you can consider:
- TigerVNC Viewer: A high-performance, open-source VNC client.
- Vinagre: A simple and integrated VNC client for the GNOME desktop environment.
- krdc: Part of the KDE desktop environment, krdc is a versatile remote desktop client.
Each of these clients has its own set of features and may be more suited to specific needs or preferences. You can install them using your Linux distribution's package manager and set them up similarly by connecting to localhost:<local-port>.
VNC Client for macOS
Accessing VNC sessions from a macOS device can be done using various VNC clients. One of the simplest ways is to use the built-in Screen Sharing application, which provides basic VNC capabilities.
- Open Finder: Go to the Finder menu.
- Connect to Server: Select
Go>Connect to Server. - Enter VNC Address: In the Server Address field, type
vnc://localhost:<local-port>(replace<local-port>with the port number used in your SSH tunnel). - Connect: Click
Connectto initiate the VNC session.
Alternative VNC Clients for macOS
- RealVNC Viewer: A popular and versatile VNC client.
- Chicken of the VNC: A lightweight and open-source VNC client.
- JollysFastVNC: A high-performance VNC client known for its speed.
These clients offer additional features and can be downloaded and installed from their respective websites. Setup typically involves entering the localhost:<local-port> address, similar to the built-in Screen Sharing application.
VNC Client for Windows
For Windows users, several VNC clients are available to connect to VNC sessions on Hyperion.
Using TightVNC Viewer
TightVNC Viewer is a free and widely used VNC client for Windows.
- Download and Install: Visit the TightVNC download page and download the TightVNC Viewer installer. Follow the installation instructions.
- Open TightVNC Viewer: Launch the application.
- Enter VNC Server Address: In the
Remote Hostfield, typelocalhost:<local-port>(replace<local-port>with the port number from your SSH tunnel). - Connect: Click
Connectto start the VNC session.
Alternative VNC Clients for Windows
- RealVNC Viewer: Offers a balance of performance and features.
- UltraVNC Viewer: A powerful and customizable VNC client for advanced users.
- VNC Viewer Plus: Provides additional features for specific uses.
As with TightVNC, these clients will require you to enter the localhost:<local-port> address to connect to the VNC session on Hyperion.